Wednesday, December 12, 2007

More Christmas Cards

Today I'm adding two more stamped Christmas cards we've received. This first one is from Martha F. who is in my 3rd level down-line. She is a hobby demonstrator, buying for herself and sister. I think she did a great job using the All in the Family stamp set. As you can see from the card, they have four boys. I love, love love this card. Great job Martha!


Valerie W. made this really cute card. She used the Snow jumbo wheel and one of my favorite sets, Merry & Bright, which were both featured in our Holiday Mini Catalog. Once again, this card shows simplicity but with the ribbon and glitter it adds elegance. Valerie, I give you 5 stars. Beautiful!

Christmas Cards from Family & Friends

I've had no time to stamp but have received some beautiful hand-stamped Christmas cards, so I'm sharing them with you. Debbi F. made this beautiful card. Using the Big on Christmas stamp set, she embossed the Noel with black embossing powder, colored it in and added the gold Zig Painty for an extra special touch. Another great addition is the striped paper from the Dashing Designer Series Paper. I also love how she made it into a tag. The finishing touch was punching out a piece of River Rock using the Small Oval Punch, folding it, and attaching with a gold brad. I love it, Deb!

This next card was made by Charlotte A. She used the Snowflake Spot and Many Merry Messages stamp sets with Whisper White, Bashful Blue, and Night of Navy card stocks. It was stamped using Night of Navy ink along with silver embossing. She also added silver organdy ribbon. I love the simplicity and elegance of this card. Great job, Charlotte!

Wednesday, December 5, 2007

Seasons of Joy, Decorated Tin

Here is another tin that will hold a gift card. Again it uses the Season of Joy stamp set. As you know, it was in the Holiday Mini catalog, which is no longer available so I apologize for using a retired set. I've had this set for 2 months, and this is the first time I've used it. Maybe Stampin' Up!® will put it in their Fall & Winter 2008 catalog next year.

Yesterday we spent the day at the Winterthur Mansion and gardens in Delaware. If you are visiting the area, or live close by, I recommend their Yuletide Tour. The tour along with the snow we are getting today, really put me in the Christmas mood. Also this past week we visited Longwood Gardens in Kennett Square, Pennsylvania. We have a yearly membership here and they too are decorated for the Holiday Season. Both of these places are worth visiting. Check out their websites if you want to know more. Have a great week and Happy Stamping.

Monday, December 3, 2007

Season of Joy, Altered Altoid Tin

Today I played with some tins I have been saving for quite a few years. This one shows an Altoids tin. I used Dashing Designer Series Paper along with the Season of Joy stamp set and a few of our Punches to alter it.

On the inside I used Wild Wasabi card stock along with some tissue paper. I also used the Tags for All stamp set. These tins are perfect packaging for your holiday gift cards. I'm playing with a couple more and will try and finish them up tomorrow. If you need more details, E-mail me and I'll be sure to get back to you. Thanks for looking and have a great day!


Sunday, December 2, 2007

Office Accoutrement, Mini Notebook

This is a small composition style notebook, and they are great to cover, especially with our Office Accoutrement stamp set. I used So Saffron Card stock, but first stamped it with the Canvas background stamp using So Saffron Ink. Once again I used my Craft ink pads on the flower, leaves and saying and once again clear embossed them. This helps the outside of my books to look great for a long time. I also used Petal & Paisleys Designer Series paper on the spine. To adhere it to the note book, I ran everything through my Xyron® machine. If you use this, make sure you have your paper in the right spot the first time, because there is no second chance. I also have used Stampin' Up's!® Anywhere Glue Sticks, and they also work great. Thanks for looking and have a great week!

Saturday, December 1, 2007

3 Cards using "Festive Favorites"

December has arrived and so did the cold here in the northeastern part of the USA. We live in southeastern Pennsylvania and cold for us is anything around 32 degrees. No snow yet, but calling for freezing rain tonight. Yesterday I stamped most of the afternoon and here are 3 cards I finished using the Festive Four stamp set. The card is Real Red and using my Real Red craft pad I stamped the Print Patterns stamp on the top half of the card. I added Clear Embossing Powder and Heat Embossed it. One of the things I remember as a child was our families Christmas Cards. It was so exciting seeing the many different cards and who sent them. I remember the cards that had raised embossed pictures or lettering and thought, wow the people who sent these must be rich! Well when you raise emboss on any card, it does add a little richness.
I stamped the 3 images using our Basic Black Classic ink on to Whisper White card stock. I cut each of them out and colored them in using my Stampin' Write Markers. I punched out the smaller images using Tag Punches. I used either the All Holidays or Holiday & Wishes stamp sets for the sayings. These too I embossed using a Craft pad and clear embossing powder.


To finish off each of the cards I added Stampin' Up'!® Ribbons. Other card stocks used were Creamy Caramel, Chocolate Chip, Soft Sky and Wild Wasabi. I would love to here from you, so tell me what you think and if I left something out, feel free to ask. Click to E-mail Me!


Friday, November 30, 2007

Bundle of Joy


Our neighbor's have a new little baby boy, Robert Marshall. He was born November 20th and is a real cutie pie. As you can see, I'm finally getting the card made. I used the Bundle of Joy stamp set with Bashful Blue, Whisper White and Barely Banana card stocks & Ink. I also used the Large Oval punch & Light Blue Gingham ribbon. Any questions, just e-mail me and I'll do my best to answer.

Sunday, November 25, 2007

With Gratitude, Thanksgiving Card


It's been a busy week. Our son Steve, daughter-in-law Amanda and their 2 daughters, Evelyn and Amelia were up from Greenville, South Carolina for the Thanksgiving Holiday. We had a total of 17 for dinner. Unfortunately our other son Ted Jr., daughter-in-law Stephanie and their 3 children Jordan, Teddy & Baylee shown here in the picture did not make it up. They too live in Greenville, but due to a new job, was unable to take off. Stephanie also is a Stampin' Up! demonstrator, very creative and a great stamper. She sent these Thanksgiving cards out to friends and family, which I think turned out beautiful! Since I have had no time to stamp, I'm adding the card to my blog. She used the With Gratitude stamp set, Sahara Sand & Pumpkin Pie Card Stocks, Always Artichoke Ink Pad, More Mustard & Pumpkin Pie Re-inkers with an Aqua Painter and then tied on some Black Gingham Ribbon. I hope you all had a blessed and Happy Thanksgiving. I'm going to try and get some stamping in this coming week. Thanks for looking and if you have any questions, please e-mail me.

Monday, November 19, 2007

Glittering Candle, Peaceful Wishes

I love stamping on tissue paper and
applying the image to a candle. Here I used the Peaceful Wishes stamp set. I inked the pine sprig with my Always Artichoke Marker, because I only wanted to use half of the sprig. I used my Close to Cocoa & Chocolate Chip marker on the pine cone. After stamping on the tissue paper, I wrapped it around my candle and then used my Heat Tool to melt it to the candle. I rolled the candle on wax paper as I applied the heat, constantly rolling the candle so it didn't melt too fast or too much. As the tissue paper turns clear, you will know it is done. I then applied White Liquid Applique, which Stampin' Up!® no longer carries, but I think can be bought at your local craft store. While the applique is still wet, I sprinkled our Dazzling Diamonds glitter on it.

Wednesday, November 14, 2007

Big on Christmas, Noel

These next two posts use the Big on Christmas stamp set. On this one I used the Bright Bulbs roller stamp on Sahara Sand card stock. I inked it by rolling it in my Night of Navy Craft pad and then Clear Embossed. I then colored in with my Stampin' Write Markers. I did the same with N el on Night of Navy card stock only this time I used an old Blender Pen, dipping it in bleach and bleached out the letters. Be sure to pull the tip out of your Blender Pen and rinse thoroughly so it can be used again for bleaching, other wise it will fall apart. I stamped the O (ball) on Whisper White, colored in and then cut out and raised it onto the Night of Navy. I also used Real Red in my layering and used my Zig Painty on the edges of the layers and on the Christmas ball.

Big on Christmas, Let it Snow!


On these 2 cards I used my Basic Black Craft pad with Clear Embossing Powder, Real Red card stock, & the snowflakes from Wishing You Cheer stamp set. The one to the left uses Very Vanilla craft pad & card stock. I also bleached the SNOW, then added some color with my markers. The other one I colored in SN W using my White Gel Pen, the snowman face I stamped out on white, cut out and raised it on the card with Stampin' Dimensionals. I like the one to the left better because it has a vintage look to it. E-mail me with your comments or questions.

Tuesday, November 13, 2007

Three Thoughts, Simply Sent Cards

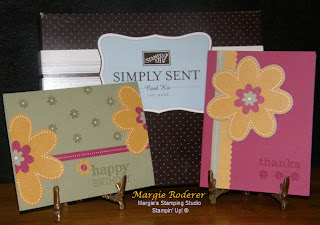
These Simply Sent Kits are wonderful. The one shown here is Three Thoughts. This kit has everything you need to create many beautiful cards. It has Chipboard pieces as well as self adhesive Die Cuts.


The kit also includes a 4 piece stamp set, More Mustard, Mellow Moss & Purely Pomegranate Stampin' Spots, Card Stock Assortment, Mini Glue Dots & 14 Whisper White Envelopes. If you have yet to play with Stampin' Up's!® Chipboard or the self adhesive Die Cuts, this would be a great kit to buy to see if you like them. I also used my White Gel Pen to accent the flowers on the one Mellow Moss card. Any questions please e-mail me, I would love to help you in any way I can.

Monday, November 12, 2007

Baby Cards, All in the Family


Here are two 3x3 cards I made with the All in the Family stamp set. The dots stamp is from my Happiness Background stamp. Ted, my DH, cut them apart and then made blocks for each one. I also used my Curvy Verses set and Circle & Scallop Punches. Have a great day!

Friday, November 9, 2007

All in the Famiy


I'm finally getting around to playing with 2 stamps sets that I have had for about a month. They are All in the Family & Family Accessories. It's fun adding heads, arms & legs to these bodies. I used Pretty in Pink, Whisper White & Certainly Celery Prints Designer Series Paper on the full size card and Purely Pomegranate, Certainly Celery, Whisper White & So Saffron PDSP on the 3x3 card. I also used Stampin' Write Markers, White Gel Pen, White Grosgrain Ribbon, Scallop Circle & Ticket Corner Punches. The Greetings are from Hug & Wishes and All Holidays. During November, 100 percent of the sales from the All in the Family stamp set will go to the Dave Abbott Family Fund. Dave Abbott was a General Manager who passed away from a rare blood disease. He leaves a wife and 3 children. If you were planning on buying this set, this is the month to do it. Any question or if I can be any help, e-mail me. Have a great weekend!

Thursday, November 8, 2007

Christmas Card, The Snowflake Spot


I've seen a lot of wreaths made with The Snowflake Spot stamp set, so I had to do one too. Using a pencil, I first drew a faint circle in the center of the Very Vanilla card stock. I then stamped a snowflake at 12:00, 3:00, 6:00 & 9:00 (o'clock, get the picture?) I then stamped 4 more in between each of these. I then stamped 8 more in between those 8, but I stamped each of these off once to get a lighter shade. I used Always Artichoke & Real Red ink pads & card stocks, Red grosgrain, the Ticket Corner & Oval Punches. It's hard to see, but I also used my Glue Pen and some Dazzling Diamonds on the wreath. I had fun making this card and it was quite easy.

Wednesday, November 7, 2007

Christmas Gift Box

I was looking for something I could use my new jumbo Snow Wheel on and I came across these 4x4 kraft boxes which I bought several years ago. I rolled the wheel using the Night of Navy ink cartridge. I then stamped the snowflakes from Festive Favorites using the Whisper White Craft pad. I also stamped the snowflakes with the Night of Navy ink pad on white Christmas ribbon. It's a little stiffer than our grosgrain's and worked out perfect for making a bow. I used the snowflake from the In the Spotlight hostess set on Night of Navy card stock with the Whisper White Craft pad and punched them out with the Snowflake Punch. As you can see, this stamp was made to fit this punch perfectly. The tag is from Punch Pals and was also punched out using our Tag Punch.

Tuesday, November 6, 2007

Thanksgiving Center Piece

This Autumn spice candle is about the size of a coffee can. I purchased it at Pier 1 Imports. I love how it smells but I needed to "dress it" for Thanksgiving! I used my Autumn Dots Wheel and inked with my Clear Embossing Cartridge onto Chocolate Chip & Pumpkin Pie 12 X 12 card stocks. I then embossed with Clear Embossing Powder. This candle is 13 inches around so I had to come up with an idea to hide the 1" gap. Well here is my solution. The saying is from God's Blessings & it's punched out with the Large Oval Punch. I used Sticky Strip to adhere it to the large oval Antique Brass Hodgepodge Hardware frame. If you warm the brads with your Heat Tool, they slide right into the candle. I also used Brown 1/4" grosgrain, gold cording and the Apple Cider Designer Series Double Sided Paper. (Try saying that fast 3 times in a row.) I have it on a long oval tray with chunky great smelling potpourri and since I'm cooking this year, it looks like I get to put it on my table! Send me an e-mail with questions or comments.

Monday, November 5, 2007

Flaky Friends Acrylic Note Pad Holder


I used Stampin' Up!'s Flaky Friends stamp set with this 5 X 7 acrylic frame. These frames work great for note pads. On this one I stamped the mittens, snowmen & tress using Basic Black ink onto Bashful Blue card stock. I colored in using my Stampin' Write Markers & Whisper White Craft ink refill with a Blender Pen. I attached the note pad with Sticky Strip and the gel pen with velcro. Very easy and they make great gifts. If you have any questions, send me an e-mail. Thanks for looking!

Saturday, November 3, 2007

My First Tutorial, How to Make a Bow

Last month I covered a paper mache box using Stampin' Up's! Blizzard, Designer Wrapping Paper, which can be found in the 2007 Holiday Mini Collection. I decided it needed a bow, so this is my first attempt in making one, which I will share with you as a tutorial today.


First you will start by cutting 8, 1" strips of wrapping paper 7" long. You will also need to cut 8, 1" strips of wrapping paper 6" long. You will also need 1(one), 1" strip a of wrapping paper 4" long. This gives you a total of 17 strips of paper. These bows can also be made using our Designer Series Papers.
Once you have your 16 strips of paper cut, start putting them together using Snail Adhesive. This is done by looping them together at the ends as shown. Make sure to keep your 6" pieces together and 7" pieces together. Next take two matching loops and place them opposite each other and attach with adhesive. Continue making all 16 loops and putting them together as shown. Now add the first 2 6" loops to the 2nd set of 6" loops to look like this. Basically crossing them on top of each other. Do this to the remaining loops until you have 4 sets of loops put together. When finished you should have 2 smaller sets of loops and 2 larger sets of loops. The next step explains how to do the hole in the center.

Once you have all 4 sets of loops together continue by placing a hole into the center of each set of loops. I used the 3/16" hole punch found in the Crafter's Tool Kit.


Now that you have all 4 sets completed, place the 2 smaller 6" sets together and the 2 larger 7" sets together making sure you off set them so they look like these. Make sure your holes align up.


Now place the smaller of the 2 bows into the inside of the larger bow lining up the punched holes and place a full size brad into the center to hold both bows together.


Now last but not least take the 4" strip of wrapping paper, connect ends together to make a circle and attach using your Snail Adhesive. Add a small Glue Dot to the loop and place it in the center of the bow on top of brad.

Here you have the finshed bow. I hope you enjoyed this tutorial and please, let me know what you think. If you have any questions I'm only an e-mail away.

Sleigh Bells Ring Christmas Card


Once again we have the Sleigh Bells Ring stamp set from Stampin' Up's! Fall & Winter 2007 Collection. This time I stamped the holly sprig into a Versamark® Pad and I then used the Clear Embossing Powder to emboss it. This was done on both pieces of the Bravo Burgundy card stock. On the Whisper White card stock I stamped the sleigh scene with the Bravo Burgundy Craft Pad. I then used the Heat & Stick Powder on it, embossed that with my Heal Tool and this left the image tacky so when you pour your Dazzling Diamonds Glitter on it, it sticks. It's very hard to see the glitter in this picture, it is much prettier in person. I also used Bordering Blue card stock in layering, along with 5/8" & 1/4" Grosgrain Ribbons. Please e-mail me with any questions you may have. Thanks for looking and have a great day!

Friday, November 2, 2007

Sleigh Bells Ring, 12 X 12 Scrapbook Page

Here it is, the 12 X 12 scrapbook page I promised. I went back to the year 2000 to get these pictures. The highlight this Christmas was our 1st granddaughter. She was 1 year & 7 days old. We now have 10 grandchildren and I don't think any of them get the attention Heather did, but we love them all the same. These pictures were taken at The Roderers' annual Christmas Eve dinner at a local restaurant. As the card I posted yesterday, I used the same colors of card stock. In addition I also used the Spiral, Corner Rounder & Square Punches, The Pretties Kit & Fundamental Phrases stamp set, which I embossed using Whisper White Craft & Powder. I also pulled out my retired Just Journaling II stamp set.

Thursday, November 1, 2007

Sleigh Bells Ring Christmas Card


Once again I used my markers for coloring in this beautiful stamp from the Sleigh Bells Ring stamp set. I used Night of Navy, Bordering Blue, Bravo Burgundy, Creamy Caramel & Whisper White card stock. I stamped the Fine Lace background stamp using my Bordering Blue pad on the BB CS. I used Basic Black for image & colored in with Stampin' Write Markers and a Blender Pen. I used my Ticket Corner Punch and also Daubed the edges with Bordering Blue. It may be hard to see in the photo but I also used my 2 Way Glue pen and added Dazzling Diamond Glitter. Before putting together I also added some Silver Elastic Cord. Feel free to e-mail me with any questions. Now to make a Scrapbook page using the same color combo and stamp set.

Monday, October 29, 2007

Keep Christmas Card, Cracked Glass


I am having so much fun with this Keep Christmas stamp set. Today I stamped the image with Basic Black Ink on Very Vanilla card stock and then used my Stampin' Write Markers and Blender Pens to color it in. I then covered the card stock using my Versamark® Pad, poured Glassy Glaze Enamel over the entire piece, tapped off excess and using my Heat Tool I embossed. I did this 3 times total and then placed it in the Freezer. After a few minutes I took it out and immediately crinkled it to give it cracks. I did this twice. The saying I stamped with Basic Black on Very Vanilla but this time I mounted it onto Bravo Burgundy then cleared it with Versamark® and Clear Embossing Powder. I also used Basic Black & Always Artichoke card stock for layering. The card itself is River Rock, one of Stampin' Up!'s® new In Colors. This technique is called Cracked Glass (click for a tutorial at Splitcoast) let me know what you think and give me a shout if you have any questions.

Sunday, October 28, 2007

Keep Christmas, Porcelain Tree Ornament


I thought I would of had time to stamp a few cards today, but having company for Sunday dinner, my day just flew by. Having seen these porcelain blanks that I bought last year to stamp, I knew I had to use the Keep Christmas stamp set on them. I stamped the images using Jet Black Staz On® and then colored them in with the Stampin Write Markers. I also used my Blender Pen to soften the back ground and add glow to the street lamp. I also used my Zig Painty® around the edge. The Candle ornament I covered with Crystal Effects and the Tiny Tim ornament I sprayed with Krylon® Latex Enamel. As you can see from the picture, the Crystal Effects gave it a much shinier look. Thanks for looking and e-mail me with any questions.


Saturday, October 27, 2007

Keep Christmas, Gift & Card


While working on my scrapbook page, I figured I would make a Christmas card and gift. These items use the same card stocks as in the previous post. What I did to the tag on the front of the jar was I cut around the candle & flame with the Hobby Blade, then I put the card stock into my 1 1/4" Circle Punch making sure the top was outside of the cutting area. It made my circle perfect. I continued to layer using my Larger 1 3/8" Circle Punch & Coluzzle. I stamped using my Keep Christmas Stamp Set and on the top of the jar I stamped Merry Christmas from a retired Stampin' Up!® set, Fancy Flexible Phrases from the 06-07 Winter Mini Catalog. I also used my Stampin' Write Markers & Watercolor Wonder Crayons for coloring in my images. Another great tool I used for distressing my card stock is the Cutter Kit. A Christmas Carol & Charles Dickens have always been favorites of mine, and to see this stamp set in the catalog this year was a must have. I can't wait to make more cards to share with you. E-mail me your questions and if you don't have a local demonstrator, I'd be happy to help you with your next project & Stampin' Up!® order.

Keep Christmas 12 X 12 Scrapbook Page


I love stamping and one of the reasons I joined Stampin' UP!® 6+ years ago, is to get 26+ years of marriage and children into a beautiful scrapbook. Well I'm still working on those pages and I may never get them all done, but as you will see on this blog, I get bits and pieces of our life scrapped one page at a time. These pictures take us back to 1986, but the products used are 2007! Chocolate Chip, Real Red, Always Artichoke and Very Vanilla card stock along with the Keep Christmas, Many Merry Messages and Très Chic stamp sets. I also used Wintergreen DS paper, various punches and accessories, which include the new Circle Rhinestone Fire Brads. Any other questions, feel free to e-mail me.

Friday, October 26, 2007

Just Like You, Ronald McDonald House Set


This is the Ronald McDonald House Charities Stamp Set, Just Like You. For each set sold Stampin' Up!® will donate $2.00 to this charity. I used Old Olive, Soft Sky, Not Quite Navy and Pumpkin Pie Card stock and Classic Ink Pads. I also embossed the sayings using our Whisper White craft pad and powder. The only embellishment is the button from our Earth Element & Neutral Buttons. Any questions, please e-mail me.

Wednesday, October 24, 2007


Here are samples of cute 3X3 cards. This was one of the 2 make-n-takes you could do at my last in home workshop. We used the Merry & Bright stamp set from Stampin' Up!s® Holiday Mini Catalog, Winter Green Designer Series Paper, Soft Sky and Always Artichoke card stock. Again we used the re-inkers with blender pens to color them in. I highlighted those snowflakes with our white gel pen. My grand daughter loves Bambi, so this set was a must.

Tuesday, October 23, 2007

Sassy Stems Card


I had a Stampin' Up! party this past Friday night and this is one of the 5 projects I demonstrated. I used Not Quite Navy, So Safron & Glossy White card stock. I stamped the Paisley background stamp using So Safron Ink on So Safron card stock. I stamped the flower image from Sassy Stems using Versamark® and embossed with silver. The saying is from Holidays & Wishes. I also used our new Basic Gray Taffeta Ribbon on the card. I lightly colored in the image using the re inkers and a blender pen.